Friday 31 December 2010

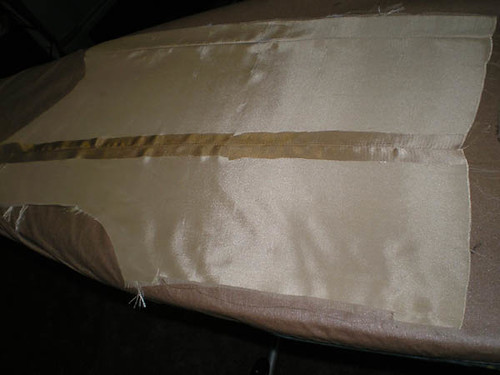
Well, that didn't work!

Spirit8b

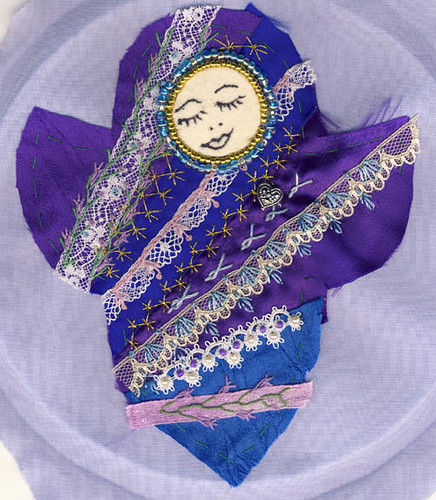
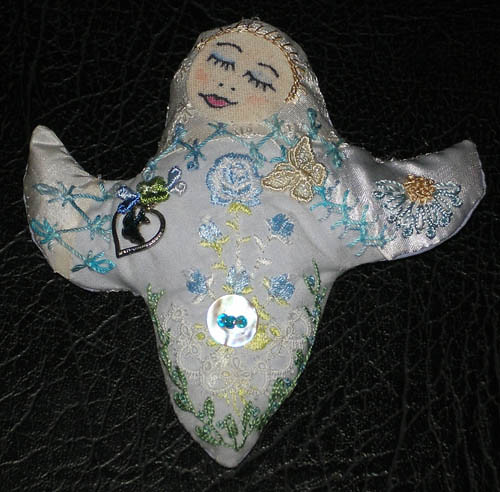
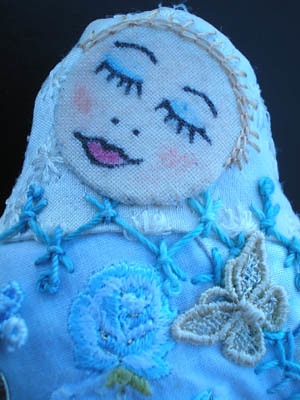
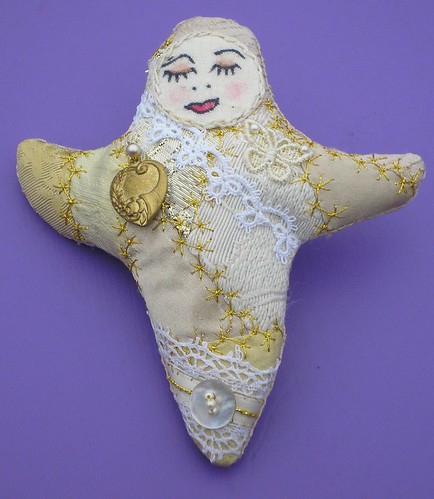
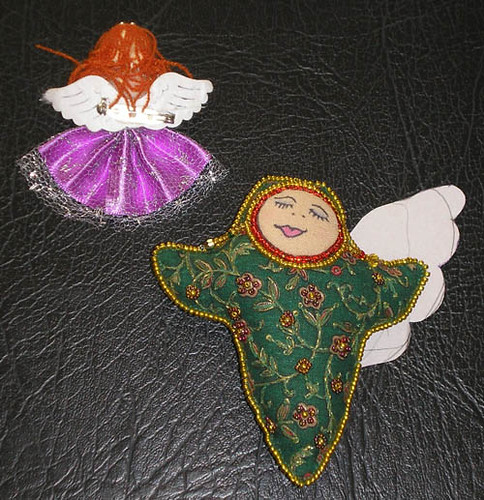
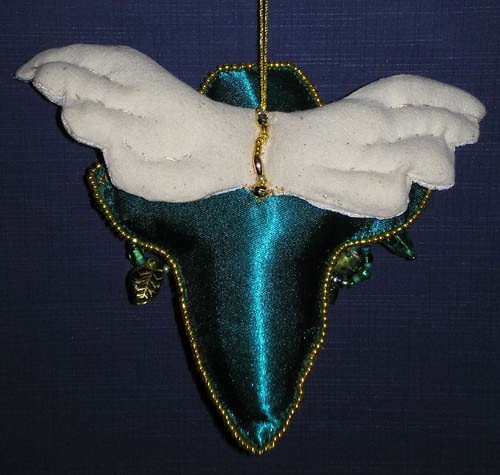
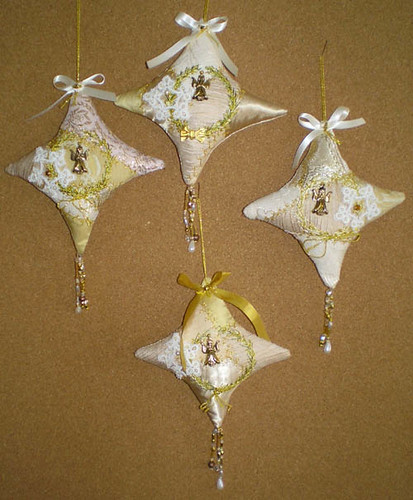
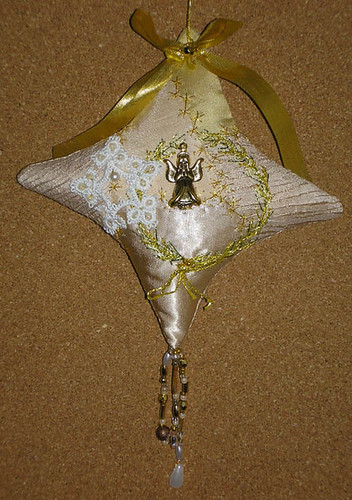
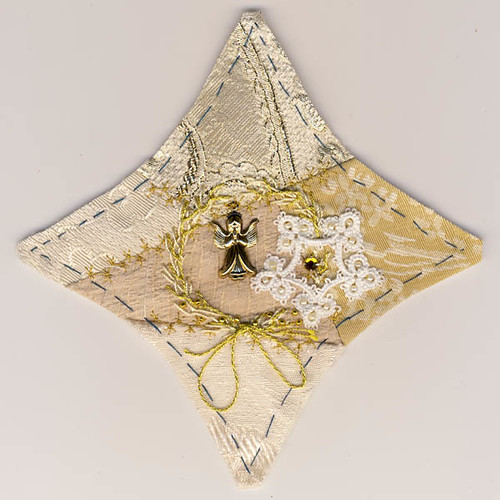
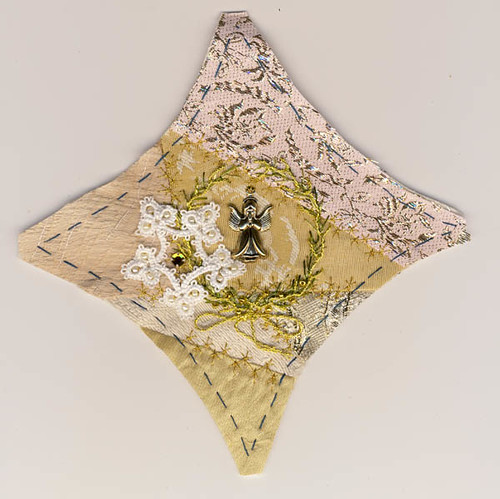
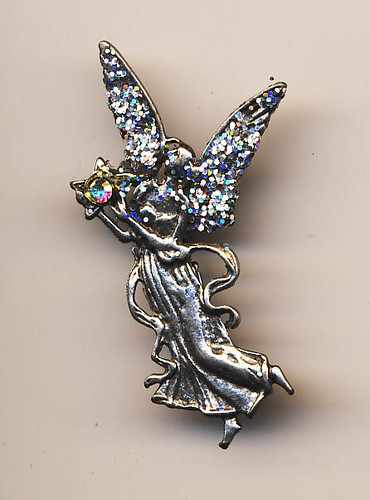
Ooooh, and she looked so lovely, But she wouldn't turn without splitting at seams, and pulling the wrong way. So not possible to make up at this stage.

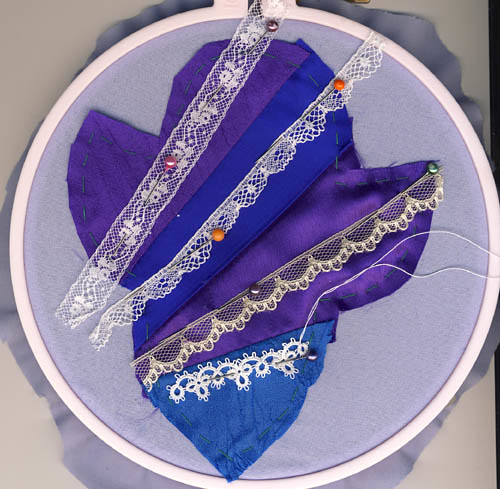
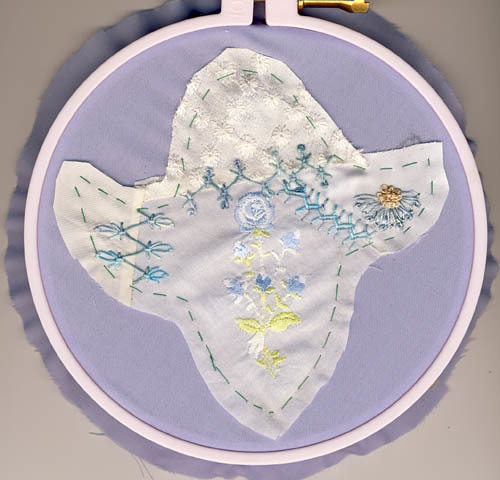
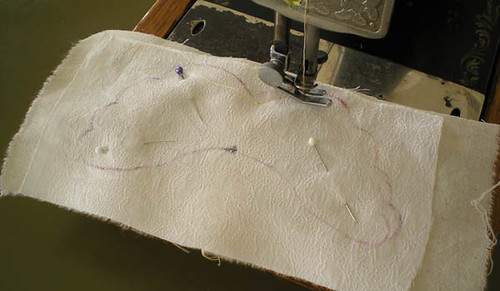
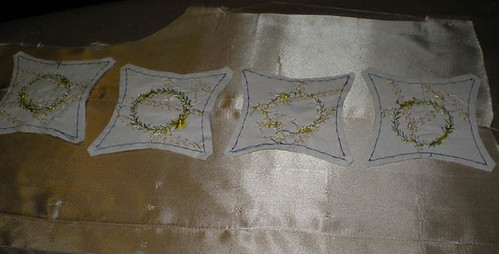
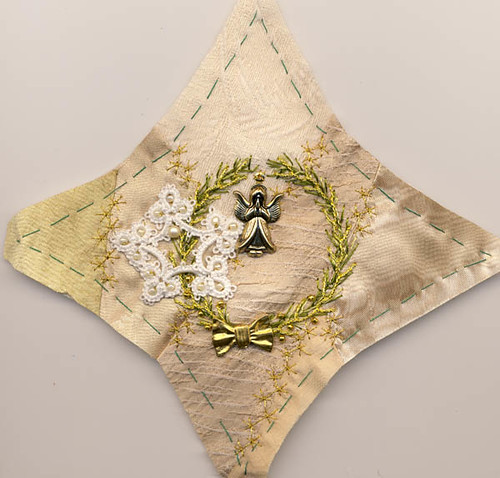
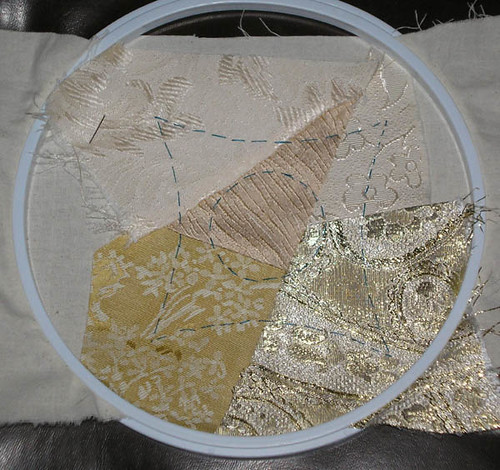
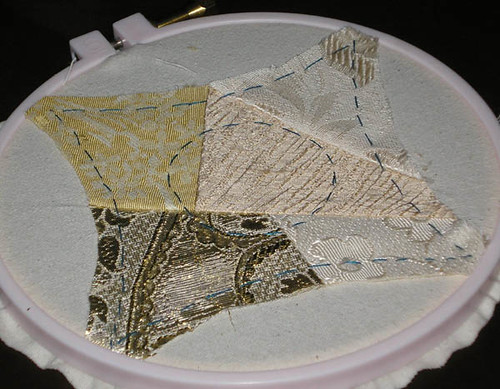
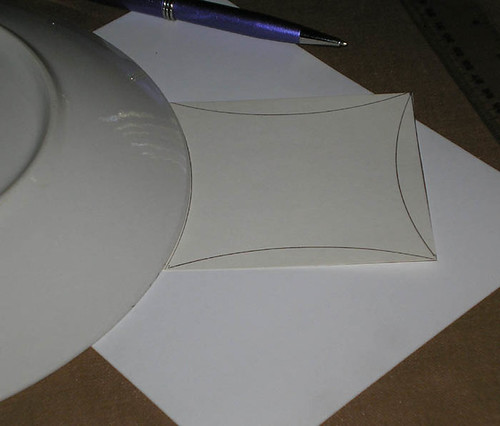
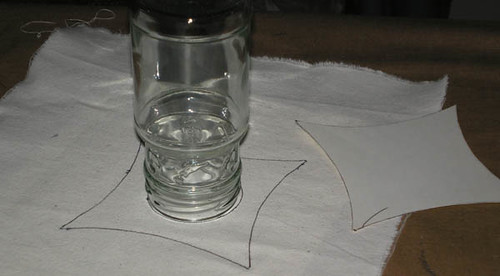
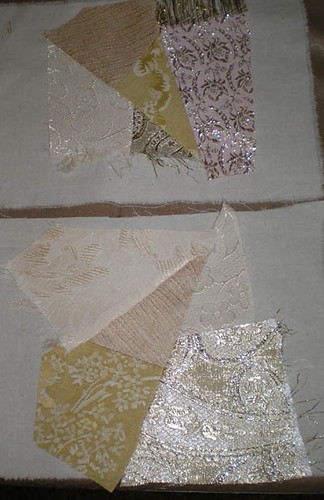
Comfort dolls are six inches max, and this one was just under five inches. I need that extra size, so I am off to an eight inch hoop. This size makes a beautiful small doll, when it works, but only with very thin fabrics. Once you hit the satins, the trouble starts. And it didn't help that I had an incorrect thread on the machine. Aaaagh!

I think I will bind this one, by hand, and just keep her as a beautiful piece of work. Unless I make a body and stitch the one with the binding to that. Lot of work though - might need to keep her for a while.

Hot day coming up - might be time to make some blocks inside.

Thursday 30 December 2010

Comfort Doll 8 on the hoop

Spirit8a

Doll 8 is on the hoop. I have actually drawn a pattern for this one, and will modify / keep it depending on the finished shape.

Piecing was a quick fan-piecing. It minimises things going wrong in the turns, and actually allows a reasonable length of seam to get a good stitch combination going.

And I have found enough narrow lace to have a bit of a choice. Still haven't found my main box though.


These dolls are working out to about two days each, when I do them individually, and spend a fair bit of time on them. May not be able to do that once the holidays are over.

Wednesday 29 December 2010

Comfort Doll 7 finished

Spirit7b

Doll 7 is finished - I never know what shape they will be, as I freehand them, until they are trued out. Not totally happy with this one, so I am (shack, horror!) drawing a pattern. The slightest change makes huge differences in the arms. Looking back, this shape has to be my favourite.

And I am almost out of faces. I draw a circle on cloth, my mother fills in the detail, and I colour them with watercolour pencils after they are sewn on. There are pictures of the process in the Comfort Doll set.

This is a closeup of the most recent one. The trick with watercolour pencils, to get intensity of colour (eg lips) is to slightly dampen the pencil.


Spirit7c

Off to draft a pattern.

Tuesday 28 December 2010

Comfort Doll 7 on the hoop

Spirit7a

Comfort Doll 7 is on the hoop. This one is based on an unfinished (ie unused) handkerchief. My mother got a lot of them from a factory for quilting.

But the really good news is that i have found my gold fabric box - and the red/scarlet one was with it, and I hadn't even missed it. Sounds like nice colours for next Christmas.

Now, why the narrow lace box wasn't there too is the question.

Monday 27 December 2010

Spirit / Comfort Doll 6

Spirit Doll 6

Spirit Doll #6 is finished (apart from wings, if she is getting any). I am enjoying making these, as I have now come up with a quick, easier method. So more will follow. I am unsure what I will do with them - send them off to the main project in the USA, or get together enough here to send them to an Australian refuge. Or maybe persist with seeing if they are needed in aged-care hostels. The women there love little animals and flowers on their walkers, and it helps them (and the staff) know whose walker is whose.

Although I think I like the idea of an Australian refuge, if I can get a dozen together.

Sunday 26 December 2010

On the Hoop

Spirit6a

We do a lot of quiet sitting and talking over Christmas, so I was just looking for something small on which to work. Where all the extra bits didn't take up too much on the couch beside me.

So it was out with the scraps from the tree decorations, and a quick spirit / comfort doll.

She hasn't told me yet if she would like to be an angel. But I know I can add wings later.


I hope everyone had a beautiful, joyous, peaceful Christmas, and that you are enjoying the holidays.

Friday 24 December 2010

My own tree decoration finished

2010 Tree Decoration.


Our own Christmas Tree Decoration for this year is finished - not that I have a tree up, mind you. It was worth it working on the four before it, as it really refined my ideas. The changes for this one are:

I worked seams in different stitches, but went away from the metallic gold thread, as I didn't want to take from the angel. She is a vintage one I have had for years.

The Angel stood out too much on the original star, so I recessed the centre using a pearl button back and front, and pulling threads through it. You can see the button on the front (maybe I should have used beads there?), but I don't think it detracts.

All my snowflakes were too big so I worked a smaller one to the same pattern, but in a finer cotton. I like it better, although they are a little harder to do. But much more delicate.

The bow is from an earring I had previously deconstructed.

The bow at the top was tied using satin ribbon and gold ribbon floss at the same time. With practice, I may be able to do even more together.

I did think about beading the edges, as I do with comfort/spirit dolls, but decided against it. Simplicity is the word.

If you would like to see all my Christmas Tree Decorations, they are HERE. It is amazing how many blog posts they have worked out to.

So it is finished, and hanging. Time to dig out my journal and do some entries, and to cook the chook for tomorrow. And to queue to try to buy prawns.

I hope everyone has a Peaceful and Joyous Christmas.

Thursday 23 December 2010

The View from my Desk

2010-12-23a

We don't have a Christmas Tree this year, and all my Tree Decorations are down with my mother in the hostel. Except for my Angels. I have been sort of collecting one a year for a few years, although don't ask me which is which.

So I thought Jean's Angel might like to hang around with her sisters for a little while, before heading off to Jean in time for Christmas.


2010-12-23b

A couple of these are special though. The white knitted one is the work of my late Mother-in-Law, who was a wonderful craftswoman. The one obscuring the dog's face is an Australian piece of craftwork with an abalone shell shirt - my Beloved gave it to me last Christmas.

And the green stone one just below it sits at my desk to watch over me every day.

Quiet day coming up today.

Wednesday 22 December 2010

Retro-fitting Angel Wings

I have been busy, busy, busy. Because I have been struck by rare brilliance (says she modestly). I made this Spirit Doll a while ago, and she was supposed to find a home with someone who needed her. There is someone special she needs to go to right now, but since it is Christmas, she is going as a Christmas Angel.

2010-12-22h

First step was to make a template for her wings. To do this, grab any handy Angel, and copy shape in right size.


2010-12-22c

Next, it is do what I say, not what you see me do.

Choose a front fabric and a backing fabric. Make a seam through the
FRONT fabric, and press open, the same technique I used for making up the Tree Decorations.

Draw the double set of wings on the backing fabric, including a seam allowance.

Sandwich the front and backing fabric, so the seam is from top to bottom where the wings join. (This example was worked with the seam in the backing fabric). [Must experiment with including wire in making them up]

2010-12-22d

Pin and sew just inside the line you have drawn. Trim, nick the fabric along the seams so they turn well, unpick the seam between the two sides of the wings, and turn the right way out. Press.

2010-12-22e

Fill with a little Dacron, using the split skewer technique, and stitch detail into the wings. Further fill out the points in the wings.

Attach wings at back - in this case, as my seam then showed, I added a line of beads down the back.
If the seam had been on the front fabric, it would have been hidden by the body.

2010-12-22g

And that's it - I added a festive garland, and she is finished.

I think I like retro-fitting Spirit Dolls with Angel Wings - there are going to be a lot more next Christmas.


Now to get back to my own Tree Decoration for Christmas.

Making Bows

2010-12-20h

Time for me to admit one of the failings that has bedevilled me all my life. I have never been able to tie bows. Not the nice little ones where the loops and the ends run the same direction.

Once, I admitted this to a friend, who blithely said "Just tie reef knots". I am quite used to them, having spent a long time around the Scout Association. I know how to tie them behind my back in the dark with gloves on.

But it didn't do them any better.

Then, suddenly, when I was making the bows for the Tree Decorations, it hit me. You tie the first half of the reef knot, manipulate them a bit (ie pull the right bits), and you have a perfect little bow.

2010-12-22b

So there was I making them up and cackling like a witch in Macbeth.

So on the tree decorations, the system was:

Tie a loop of cord with an overhand knot. Let the ends hang out a little, and tack it to the top front of the decoration, using Madeira Metallics Old Gold. Then tack on the bow.

Bring the thread to the front from the back, pick up two seed beads, one feature bead and two seed beads, and go through the ribbon to the back. Tie off.

If you don't like seeing the stitches on the back, sew a small pearl button over it.

And life is easier if you remember to insert the loop before sewing the two pieces together - but then you don't have the ends to hang down. I could thread beads onto those ends too.


Ornies Wreaths

2010-12-22a

I am gently sewing along on my own Christmas ornie. Maybe I will confuse issues by calling them "Tree Decorations" from here. There is a good collection of them over on Stitchin Fingers. Just click on the link in the third line.

When I first started doing these, they used to be just a continuous circle - this one is in silk ribbon and ribbon floss. Which is fine. But now I like playing with something that is a bit more like a laurel wreath.


2004-2

The one I am doing would have been heavier, if I hadn't run out of off-white rayon.

Tuesday 21 December 2010

Making up the Ornies

There was a bit of fun batch-processing the Ornies when I came to make them up. I'm never good at making things up - usually I get a piece of fabric for the backing, and just leave a little open at the side and stuff filling in through that, then stitch it closed. And it ends up looking lop-sided.

2010-12-20a

This time I got the backing fabric (which previously had a life as a blouse), folded it in half, right sides together, and ran a line of stitching down about an inch in from the fold. Then I cut it open and pressed it open. That is what you can see above.

2010-12-20b

I then turned the backing over, and put the ornies onto it, so right sides were together. The seam on the backing fabric ran across the middle of the ornies, well away from the points. They were then pinned (no time for tacking), rough cut out, stitched down, then trimmed.

Next step - unpick the seam at the back, and turn the ornie right way out. Force the points out with the blunt end of a wooden skewer. Fill - I used Dacron.

HINT: If you use a disposable skewer, and slit it a little way on the blunt end, you can catch a little of the Dacron in the slit and spin it onto the skewer between finger and thumb. It stays attached while you force it into the points to get a firm fill. Then just hold firmly and you can pull the skewer out again.

Then, when you have enough filling inside, just slip stitch up the back.

NEXT - those jolly little bows.

Monday 20 December 2010

Christmas Ornies finished

2010-12-20c

The four ornies that I needed to post have been finished and posted. Phew!!!!

2010-12-20g

This is a close-up of the one I sent to Sue. I know it is hers, as she gave me a candle where the wrapping was secured with gold ribbon. Nice ribbon. Too good to waste. Sending it back to Sue (with explanation). All are going to women on my team where I work on Wednesdays.


2010-12-20i

This is a close-up of the detail in one of them. I only had four of these angels, and I do so like them. Must find more before next year.

Only my own to make now, and I have some time up my sleeve for that.

Saturday 18 December 2010

Christmas Ornies Day 4a

2010-12-18c

Third ornie embellished - might make the deadline yet.

Have definitely decided the order is 1. Wreath 2. Snowflake added. 3 Seams.

The bow is part of a previously deconstructed ear-ring. Wish I had more of them.

And gosh - the cricket sure is mesmerising. Wonderful to work to.

Christmas Ornies Day 5

2010-12-18aAlign Center

Here we go - two embellished, two to go for the Monday deadline.

2010-12-18b

Main lesson learned today - do the tacking for the outline of the wreath in one of the threads you will be using for it. That way you don't have to worry about pulling out the tacking!

Friday 17 December 2010

Christmas Ornies Day 4

2010-12-16a

Still working on the prototype, before I start mass production. Need to have four in the mail on Monday.

Above: The blocks are placed in an 8 inch hoop, and the design tacked in contrasting cotton.

Then, below, the blocks are trimmed and put into a 6 inch hoop.


2010-12-16b

Then, after doing some quick seams in two strands of Madiera Metallics, I worked the wreath in two layers of off-white rayon, following the tacking, then removed the tacking. One of my tatted snowflakes was then added.


2010-12-16c

To work the wreath, I start at the top and work one side in Feather stitch, finishing at the bottom. Then I work the other side, starting again at the top. Then I work another layer on top - basically building up texture.

Off to get serious about getting these finished.

Thursday 16 December 2010

Christmas Ornies Day 3

Still ironing, but the Christmas Ornies have progressed a little further. This is my process so far:

2010-12-15a

Step 4: Make a four-inch square in light cardboard, and find a suitable curve to take a slight "bite" out of each side of the square. In this case a dinner plate was fine. This gives me the template.

2010-12-15b


Step 5: Draw the shape on the backing fabric. I use a felt-tip pen, so the design leaks through to the other side. (What did I learn - make the backing slightly larger than 8 inches)


2010-12-15c

Step 6: Piece fabric onto the backing, on the "wrong" side, making sure all the design is covered. Try and avoid having seams going into the points on the corner. (What have I learned since - avoid lame/shiny stuff. Too bossy)

That is where I am up to at the minute. With two of the seven ornies I need to make. Need to get a move on, but will do some more ironing first.

Tuesday 14 December 2010

Christmas Ornies Day 2

Disaster!

Today was supposed to be:

3. (coming up), find sewing machine and fabric. (not as easy as it sounds, some in this house, some 50 minutes away).

However what it turned out to be was:

Step 3 Try to find gold fabric, and fail dismally.

Step 3a. Open whites/creams box as next best. This is a sealed plastic box in the shed. Find fabric all has that terrible damp smell, and little pockets of dust all through it. Still trying to work out why, as it is totally inexplicable. Yes, it went into that box after the flood a couple of years ago, and even if I hadn't noticed the damp, I would have noticed the dirt.

Bugger. Not option for it, but:

Step 3b. Three loads of washing. On delicate, as these are bridal fabrics etc. Many totally ruined.

2010-12-14b

Step 3c coming up - heck of a lot of ironing.

Meanwhile, I sure need an angel. This is a closeup of the one going on my ornie. I cannot date it, but it is beautiful.

2010-12-14a

The ornies will resume tomorrow, when the ironing finishes.
Lot of fabric totally beyond saving, and going out. But the rest of the boxes, on a quick look, seem to be okay. Imagine if this happened to my purples!

Monday 13 December 2010

Christmas Ornies Day I

2010-12-13

Mass production of Christmas ornies, steps 1 and 2

1. Make a heap of snowflakes.

2. Find enough angels. (One of them is an old broach I have been meaning to use for a long time. That one will be my ornie)

3. (coming up), find sewing machine and fabric. (not as easy as it sounds, some in this house, some 50 minutes away).

4. Sew.

Stand by - these will be the quickest and easiest ornies you have ever seen.

Sunday 12 December 2010

Christmas Ornies

2005-1b

I always leave things to the last minute. Always! Now that the house is on the market, things may slow down for a little while, and I feel the need to make some Christmas ornies. Talk about leaving it to the last minute. I think I need six.

2004-1

These are all some I make in 2004/2005, which I think is the last time I made them. Then life got just a little bit too busy.

So I am going to make a few quick ones in this format:


2004-2

First trick is to make five more snowflakes. I have to do a long road trip as a passenger today, so hopefully .....