Monday 9 January 2012

Blogiversary missed!

The incredible sharonb is having her blogiversary - and that reminded me that I was somewhere in January, too, only a year later. Sharon was one of the first, on 9 January 2004.

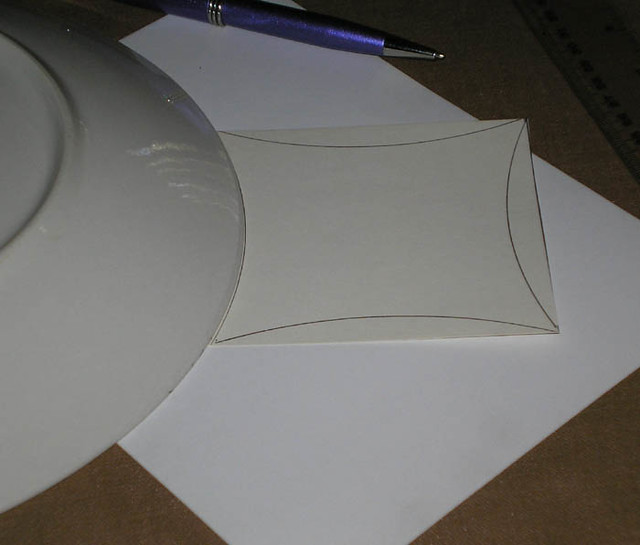
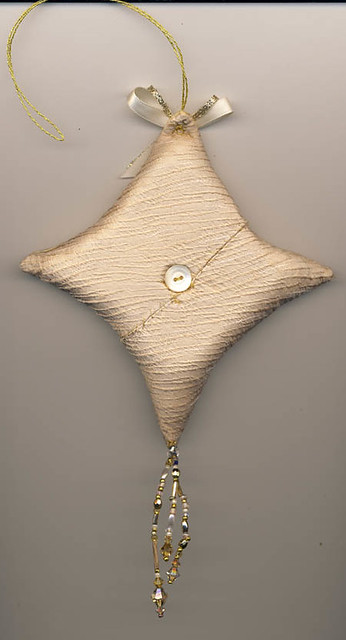
So I am two days late remembering mine - having started on 7 January 2005. Here is my first post - and that UFO is still not finished, although it is much further down the line. If you don't believe me, you can check it out HERE. :)

So do drop over and wish sharon all the best - she has started a lot of us off on a really rewarding path - and has some thought-provoking insights into the world of blogging. She has blogged consistently most days, whereas I have dropped in and dropped out as family pressures take precedence. But it has still given me a wonderful record of what I have been doing, many friends, and an opportunity to write - some of us just have to write!

Sunday 8 January 2012

Purple Purse embellished

I started on this purse last August, as something to stitch on while my mother was having treatment, and also to use a piece of tatting by Ann, from my mother's hostel.

It is now to the stage where embellishing is finished, and it is ready to be made up. I just need to get to a store to buy wadding and some stiffener. Can't find any of mine.


Purse3

I was going for an "all-over" treatment that would allow me to show off the colours - all seams are in the same crossed herringbone I love, in Madiera Metallicas gold, with the same vine wandering across the block. It is in crochet cotton, which I am using increasingly. It is just random fly stitch, where I have gone over it with a second time to make each arm a leaf of flowers.

Purse4

I spent a fair bit of time thinking about how to embellish the tatting. In the end I went for a small clear bead, sewn on with silver Madiera Metallica. The picture really doesn't do it justice. The beads in a packet are fairly ordinary clear, but once they are attached with the silver thread, they really sparkle. They were sewn on twice in the first pass, and then again once more on a second pass, with a different thread, to make sure they stay attached on a purse that may be handled a fair bit.

The beading took a bit of thought. I was right with the centre circle, then initially I wanted to fill in each loop. After a while, realised that a small bead for emphasis showed off the loops better, just sitting in there like a little flower, nestled in the pointy part.

The Christmas ornie I started is ready for piecing, so it is "what next". Think it might be a purple version of a doggie vest I have made once before.

Much Excitement!

Much excitement here.

Only about three sleeps to go.

Why? Here is a clue.

Friday 6 January 2012

Christmas Ornie Pattern

It is always a compliment when someone asks for a pattern. The incomparable Leslie at Pinyon Creek Stitchin has asked for the pattern of the Christmas ornies I am currently making.

They look like this:


2010-12-20c

and are dead simple. This one was my favourite, that I kept for myself. For too many years I didn't keep one for myself.

First, a few more years ago, I started just doing four inch squares, and they turned out like this:


2005-1b

The clue is if you look at the one on the right. It definitely is not a square when it is filled, it is starting to go star-shaped, due to the amount of filling. So I decided to see what would happen if I took a square, and took a tiny "bite" out of each side, like this:

2010-12-15a

The template is a large dinner plate - if you want an even pointier star, use a bread and butter plate.

You end up with a pattern like this, based on a four-inch square:


Ornies pattern

This is the stitching line - you need to add a quarter of an inch seam allowance.

When I was making these ornaments two years ago, I posted a lot of descriptions on my blog HERE - just go down to the end of that month, and read from the bottom towards the top. There is also a set on Flickr, but without as much detail.

Two quick hints on making them up -


Ornie reverse

When I make them up, instead of trying to hand-stitch the last slit on the side (which brings them out uneven), I make the reverse out of two pieces of fabric sewn together, and once I have sewn around all the sides (with right sides together), I unpick part of the slit across the back, turn it the right way out, fill, and sew the slit up again. I don't get too fussed with how the reverse looks, but if you don't like it, you could always sew a bit of lace across it.

And I now like them with a dimple in the centre, so they are not too "fat". I use a button on both sides to get tension, but you might be able to get away with a large bead on each side if you wished.

Enjoy - remember there are detailed pictures on Flickr.

Thursday 5 January 2012

Christmas Ornies started!

Christmas ornie 2012-01

I know this may sound silly. Very silly. But I have started my 2012 Christmas ornies in January.

There are a few reasons. There is an absolute luxury of tennis and cricket on here to watch at the minute, so I am watching. When that happens, I like something small on which to work - something I will get finished. More and more I am liking the thought of working on very small pieces. Which I probably will not even keep. I missed having a few to pass on this Christmas.

But more than that - I am going to play with the idea of making up a stock of them, and somehow selling a few near Christmas for the auxiliary of the hostel where my mother is.

But all the time experimenting with stitches and techniques on each one. And using a tiny bit of tatting on each.

And maybe a few other things - when I can find them all again. So this is the first one, just hand-pieced, as I was too lazy to get out the machine. I need to revisit piecing, as I can see some parallel lines on there - and them I do not like.

So I shall take it as a challenge to see if I can disguise them.

Stay tuned.